Showing posts with label nativity. Show all posts

Friday, December 4, 2015

A Simpler Christmas....and my Decorating Dilemma Solved!

We were so excited to adopt our two kitties in September. We never thought about having to worry about the Christmas tree in December. My last kitty never bothered the tree or any of my decorations.

And then there was Cyrus. To catch up on my Christmas decorating dilemma, you can click here.

So to solve this dilemma I decided to go with a wall tree as seen in my last post. Except my tree would go on my double pocket doors instead of a wall in the living room.


I bought some Command hooks and just started sticking them to the door. I have had the garland from when we first moved into this house 19 years ago (I save stuff!) so I just shaped it in a tree pattern.

Some red bulbs and my hand made paper tree topper and done! I didn't do any lights because of the cord hanging down for playful kitty eyes to see.

Lots of room underneath to put the gifts


I found the small vintage ornaments at the public market. They add just the right touch.
 
The simpler tree inspired me to go simpler everywhere else I usually decorate in the house for Christmas. You may not think some of it is simpler, but for me, it is!! I have so many decorations, but this year only a quarter of them will be used.

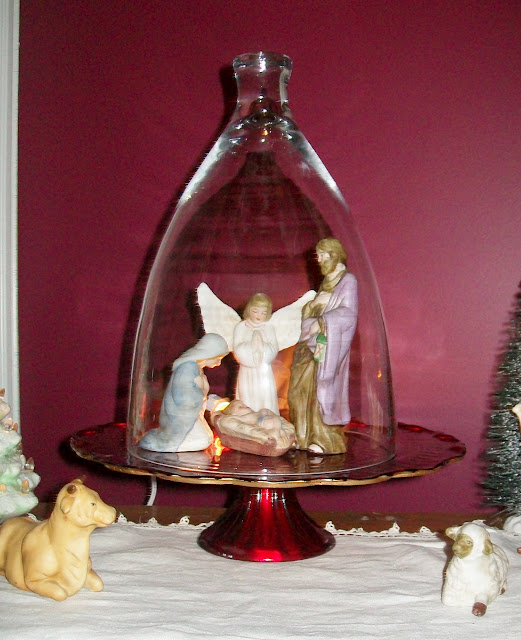
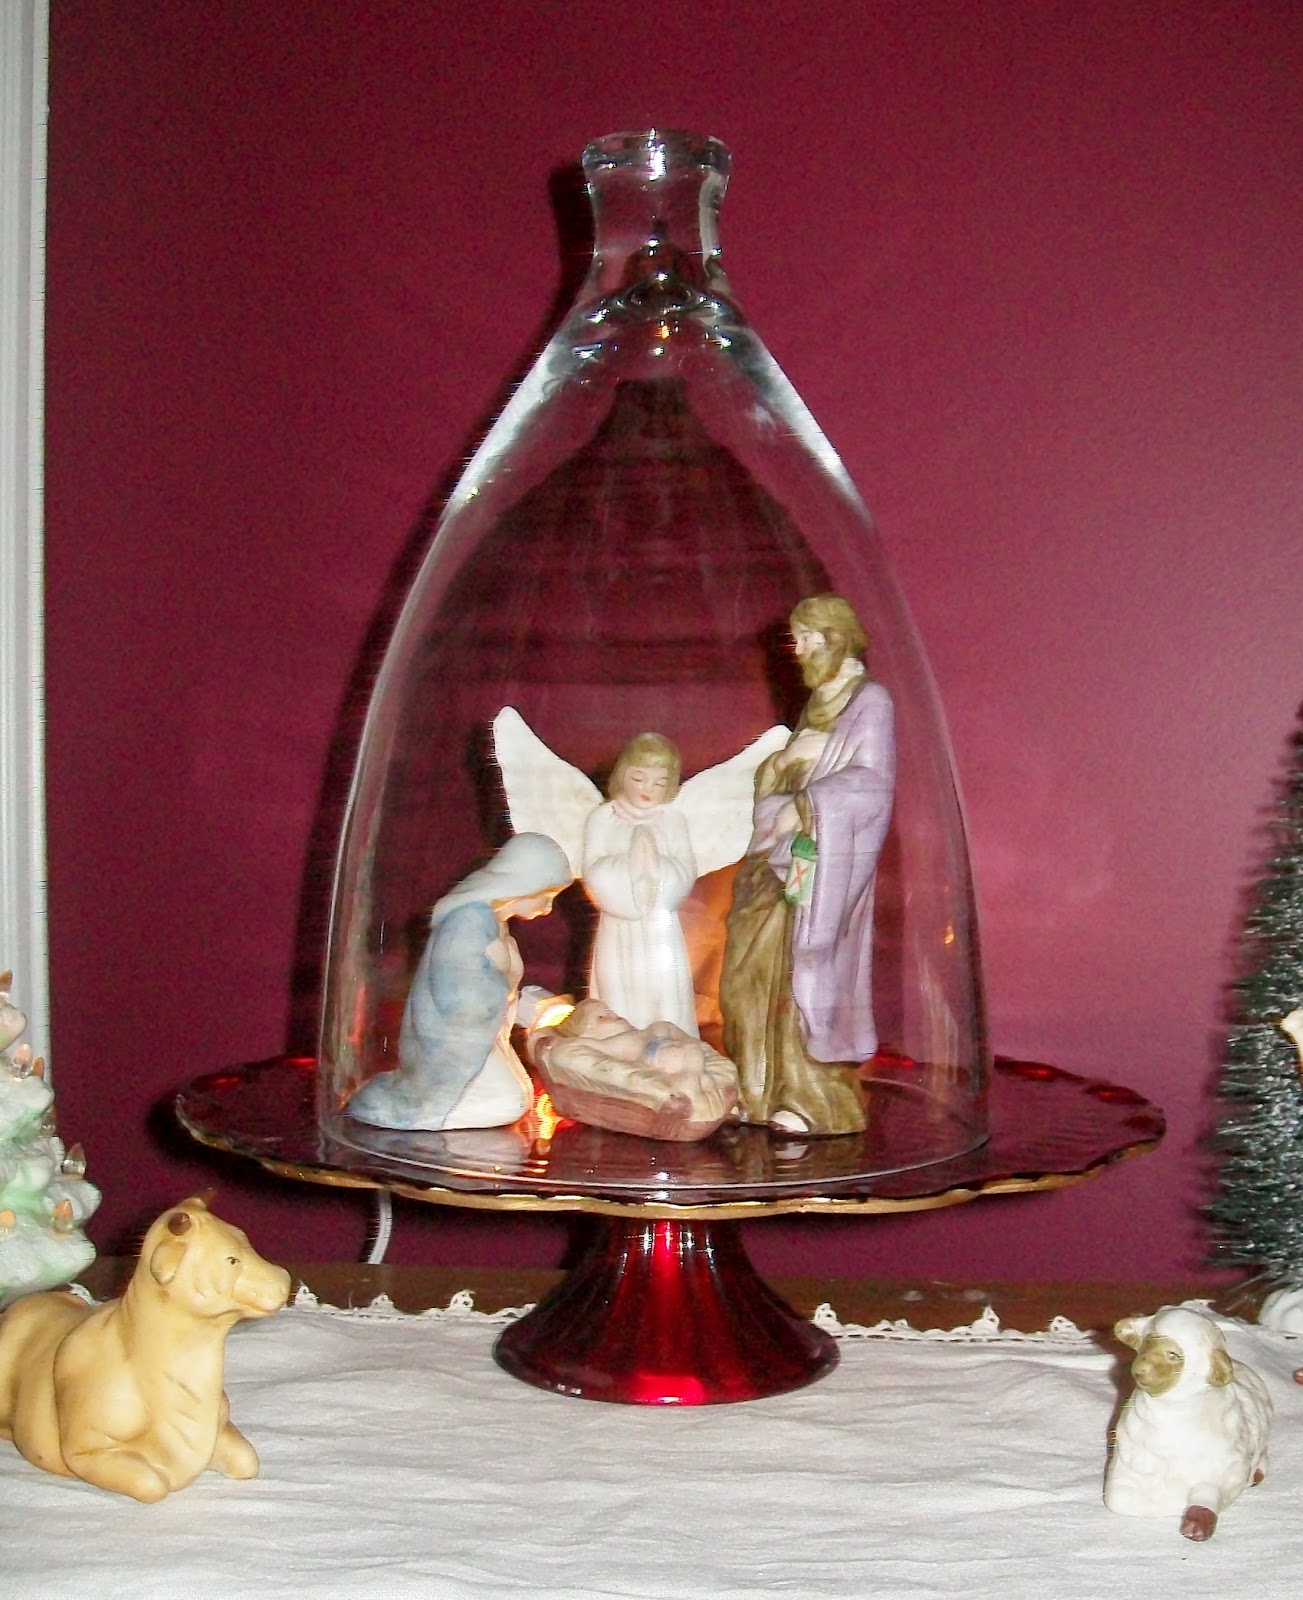
I have at least four nativity sets that I love to display and this vintage one is my favorite. When I saw
how Lori  at Dining Delight displayed hers, I fell in love and had to try it.

 
I just happened to find the glass cloche at JoAnn's on sale. I set it all up on a red cake plate with a
small light to shine through.


My parlor mantel changes every year and it is usually done up with a huge wreath, stockings hung from the mantel, and a yule log in front of the fire plate. Not going to work this year.


I found the vintage picture at an estate sale on my street this summer. It is a woven tapestry framed in a gorgeous vintage frame. It makes me think of "over the river and to the woods to Grandmother's house we go"! I knew it would go great with the vintage ceramic set of trees, carolers and a horse and sleigh I found last year at my favorite thrift store.


On the opposite side of the room are my wing chairs and antique table with the window seat behind it. I usually really embellish this area but again, not this year. I am taking a huge chance with just the three trees on my table! The one on the left is a thrifted safety pin beaded tree.


Just some hand made star pillows from my sister on the window seat.
 
 
In the dining room I always decorate the top of my cupboards. I have been collecting vintage deer so it is a woodland theme again this year.


The table centerpiece gets changed up every year. I was inspired to use my fabulous snowmen made by my artist friend Michelle. The little trees were made by Donna at Distressed Donna Down Home. I had to have them!


This is where the aqua tree I made of vintage, rusty metal parts a few months ago is....for now. I keep changing my mind on where things will stay every time I walk through the house. Do you do that?!
 
That blue thing to the left near the baseboard is a kitty toy!

 
Or maybe it looks better here?


 My husband and I both had to sacrifice putting up our own tree this year.....his is a super hero tree and mine is a snowman tree. He found a solution for his....

 
Just a simple centerpiece on the kitchen island with a few other things here and there and the kitchen is decorated.
 
 
The ornament is just one of the many treasures I received from Pam in an ornament exchange I joined. She made this one.
 
 
This is one of the other things in the kitchen and it covers three categories....thrifted, vintage and kitschy! I had to have him.
 

The snowman plate is from an Estate sale. The woman sold something her grandchild made her!! I bought it for $1!


If you are still with me, I have one more thing to show you. Every year I make a few things for gifts.

 
Totally forgetting that I bought a stocking last year at an after Christmas sale (I have too much stuff to keep track of!), I bought this one at a sale recently to decorate for my daughter and her husband. I still hang stockings on the hall banister for my  husband, son, daughters and their husbands, and my grandchildren, and fill them every year. I never did like the one I had for my oldest daughter Candice and her husband Matt. They live in a cottage in the woods and their house is decorated in woodland colors. This stocking is just their style (even though it will be hanging in my house!).
 
 
I printed out some cutouts online of trees and a deer and cut them out of felt. I added some snowflakes and snowballs. 


Done!
 
With this post too!
 
AnnMarie xoxo


P.S. The edit version does not show all the misaligned sentences for me to fix. Drives me crazy trying to fix them....I've tried everything I know. Anyone have any suggestions?


I am linking up with these great blog parties: 


Thursday, December 11, 2014

A Very Vintage Christmas


I look forward every month to sharing on the Every Room in the House Blog party on Nancy's blog, A Joyful Cottage.


For the month of December you can join in by choosing the room for the Deck The Halls theme.

I have chosen the parlor in my Victorian home to link up.


I decided that since I am such a vintage junkie, I wanted all my Christmas decor to be true vintage this year. I had some vintage already and I found some new treasures to add. I am so excited about the red tree I found and posted about here. I had wondered if I could decorate it with my victorian ornaments, that usually go on a white tree. I think so!

Before

After


While out picking one day I came upon this wonderful ceramic set at one of my favorite thrift stores. I am always looking for things to sell in my Etsy shop, but when I saw this I knew it had to go on the mantel in my parlor. It is way too heavy and fragile to ship anyways!


I made the wreath several years ago and with a little revamping, it completes the scene. I added my JOY banner that I found on Etsy last year and added a pearlescent string of pearls, woven in and out of the four ceramic pieces. A lighted pearlescent garland makes a pretty illuminated back drop.


I put my white "Nana's" tree on the top of my book cupboard this year. I found this beautiful, unique tree with the round multicolored bulbs last year at a thrift store in a box marked "Nanas Tree".


The angel is from the 50's. She is a tree topper with a gold mesh dress, a paper mache head and is holding a plastic poinsettia.


On the window seat to the left of the red tree is my look-alike Putz winter church scene and to the left of that is my nativity that I have had over 20 years. It appears in different places each holiday decorating season, but I always find a place for it.


The side table is perfect for my kitschy nativity made of plastic. I just love the vintage, hand painted messy look of it and it fits great next to my ceramic tree that is so unique. It is hollowed out in the back with a bulb that lights the multicolors in the front and casts a shadow on the wall in the back.


I did not know what to do with my round table between the two wing chairs. I didn't want to block any part of the window seat but the room needed more light despite the lit up trees and the garland. I love the look of decorating with a vanity mirror so I put my small pink Victorian lamp on a small rectangular mirror and then added the vintage beaded safety pin tree.


At night it helps to light up the whole scene. The abundance of snow from the nor'easter that made it's way through our area adds so much charm to the scene.


This is the first room you see when you enter from the hallway......I wanted it to be as inviting as possible while keeping the character of my Victorian home.


Happy Decorating!

AnnMarie xoxo

I am linking up at these great blog parties:

Every Room in the House
Let's Talk Vintage
Thriftasaurus
A Return to Lovliness
Creating Christmas Link Party
Treasure Hunt Thursday
Pink Saturday
Strut Your Stuff Saturday Link Party
A Bouquet of Talent Party
Thrifted Merry Christmas Blog Hop
Masterpiece Monday
Make It Monday
Show and Share
Vintage Inspiration Party
Wake Up Wednesday Linky Party
Home and Garden Thursday
Share Your Cup Thursday
Feathered Nest Friday
Freedom Fridays with All My Bloggy Friends

Thursday, November 21, 2013

DIY Advent Calendars - A Tradition

I am not sure when it all started but one of the Christmas traditions at my home every year is the Advent Calendar. The festivities start December 1st.

I think when I found my advent calendar on sale for half price and had to have it, I instituted the tradition........meaning that I suggested to my husband to fill it for me so that I could have a treat every day of December!

A beautiful display piece with the doors closed


Don't worry....I made both my husband and son their own advent calendars and each year I fill them up with treats for every day in December too.

An Advent Calendar is a special calendar used to count or celebrate the days in anticipation of Christmas. One window is opened every day leading up to Christmas. The calendar windows open to reveal an image, a poem or a portion of a story, such as the story of the Nativity. A small gift, such as a toy or a chocolate item can be put inside.


I will explain how I made my version of an advent calendar for my husband and son and, if you are a sewer, it should be fairly easy to make one of your own. I apologize that this is not exactly a tutorial. These calendars are already made and I don't have any step by step pictures.

I made these for my husband and son. You can choose any fabric and colors to suit whoever you are making it for or to match your décor. You can scale it down also to fit a special spot.

My husband Frank's calendar had to be Spiderman, a superhero favorite of his since childhood....


My son Michael's had to be a Gecko theme since he has a real Gecko in a cage in his room named Geck's. I actually found material with Gecko's on it.....


Materials Needed:
 
fabric of choice for the front (the screen print spiderman measures 34" x 44")
fabric of choice for the backing (same size as the front)
felt for the pockets - about a yard
black marker
number stencil
36" dowel - 1/2" thick
1 yard cording or twine for the hanger
 A large enough spot to hang it!


For the Spiderman I used the screened by the yard prints that are found at any fabric store. That determined the size it was going to be and the amount of fabric I needed for the back. I used black felt by the yard for the black.
 
 
For the pockets I cut out 24  4" x 4" squares from red felt and used a number stencil and a black marker for the numbers, 1-24. If you have a steady hand you could free hand the numbers. For the gecko calendar I used a product called Scribbles in Iridescent Charcoal Grey for the numbers. It is 3D paint which dries to a hard finish. I penciled the numbers on and then traced with the paint.


Next pin the pockets evenly on the front fabric in random order. It's more fun to have to hunt for the number and the treat than to have them all in order! Sew them on three sides on the machine leaving the top open.
 
 
Once that is done sew the back fabric on.With right sides together, I sewed all four sides with a 5/8" seam, minus about 6" to turn it inside out through. Once turned blind stitch the opening closed. On the outside I sewed a finishing seam along the black border that was already there. If there is not a border sew a 1/4" seam all the way around the edge.
 
For the dowel pocket turn over the top 1 1/2" and sew down. If you have a border at the top of your front fabric that would ruin the design by turning it over, leave the top open when sewing the front to the back and add a 2" wide piece of the back fabric after you turn the whole thing right side out. Turn that down 1 1/2" and and sew it down.


 On the gecko calendar I didn't have a border so I just turned the top over 1 1/2" and sewed it down.

 
Knot your cord or twine on both ends of the dowel. You can add any other embellishments you want, like I did with the gecko with the Santa hat on. I just drew him and cut it out of felt and glued it all on.

 
Need ideas what to fill the pockets with? I have filled them with small toys, small candies, socks and razors. A fun thing to do for an item that is too large for the pocket is to write a note with a clue on where it is hidden and put the note in the pocket. I have done this many times with bottles of favorite beverages that are hidden in the back of the fridge.

Another great idea is to write out notes of holiday inspired things to do to fill each pocket. For example...."fill the bird feeder today with dried cranberries" or "bake some cookies for your neighbor" or "take a drive tonight through the neighborhood to see the lights"....

Be creative! It is fun for the one who fills and for the one who receives!

One last thing for those of you who love the idea of an Advent Calendar but don't want to sew. There is a wonderful website out of England that I subscribe to year round for greeting cards to send online. Every Christmas they offer advent calendars to download onto your computer that you can go and check every day starting December 1st. They are done with beautiful graphics and lots of activities. I send one to each of my granddaughters as a treat for them leading up to Christmas.

Here is the website:
https://www.jacquielawson.com/advent?source=jl205


AnnMarie  xoxo

I am linking up with these great blog parties:

What's It Wednesday Link Party
Adorned From Above Blog Hop
Open House Blog Party
Treasure Hunt Thursday
Thursday Favorite Things Blog Hop
Anything Blue Friday
The Pin Junkie Friday Link Party
DIY Sunday Showcase
A Bouquet of Talent
Sweet & Savoury Sundays
Marvelous Mondays
Inspiration Monday
Make It Pretty Monday