Wednesday, October 24, 2018

Concord Grape Pie and Grape Bread....a Labor of Love


One of the things I look forward to most in anticipation of Fall is all the great baking I can do.


One of my most favorite thing to make is grape pie from Concord grapes grown in the Finger Lakes.


I just need to drive about 45 minutes to get to Naples, NY where the grapes are homegrown in abundance. I like to stop at roadside stands to buy them or go to Joseph's Farm Market just on the edge of town.


The drive down there is beautiful, especially in the Fall and the scenery all the way never gets old.


Making grape pie is a labor of love. Harvesting the grapes is not part of it but I did have a summer job once where I had to tie all the long vines up before the fruit appeared so they could hold the weight of the grape clusters.


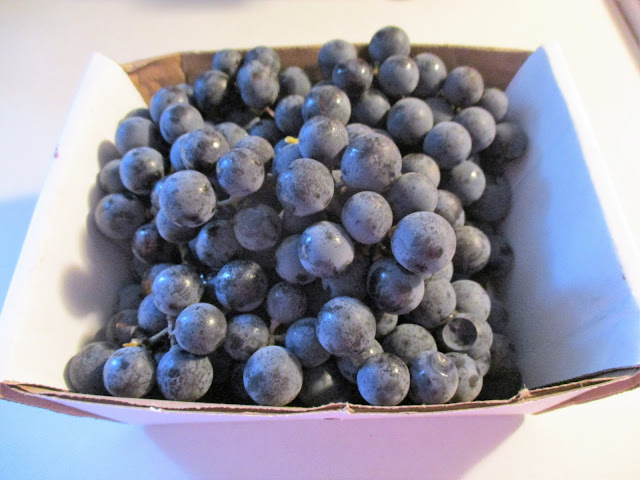
We will start with these...


I call it a labor of love because of how you have to prepare the grapes. It is not hard, just time consuming.


You have to squeeze the grape out of it's skin......on all of them!


Cook them down and then smash the seeds out of the pulp....


Here's the recipe so you can get started. It is from Applehood and Motherpie, a local Junior League cookbook.


Finger Lakes Grape Pie with Two
Crusts or Streusel Topping


Two pie crusts for the two crust version. One pie crust for the Streusel version. I use Pillsbury All Ready Pie Crusts. I think they are as good as homemade.

For the Filling:

3 cups Concord grapes                                            
1 cup sugar
3 tablespoons flour
1 tablespoon lemon juice
1 tablespoon butter, melted

Wash, drain and stem grapes. Remove and reserve skins. Simmer pulp for 5 minutes.
While hot, press pulp through sieve to remove seeds, or use a pestle and strainer.
Combine strained pulp with skins.
Combine sugar and flour and add to grapes. Blend in lemon juice and butter.
Pour into crust. If using Pillsbury pie crust, you will have a second crust for the top or you can use the streusel topping below.

For the Streusel topping:

This recipe is from Thru the Grapevine, another Fingers Lakes region cookbook.

1/2 cup quick cooking oats                                       Mix oats, sugar and flour; cut in butter.
1/2 cup brown sugar                                                  Place on top of pie.
1/4 cup flour
4 tablespoons butter

Bake the pie at 425 for 10 minutes and then 350 for 30 minutes, or until the top is nicely browned.


I had a bunch of grapes left over so I decided to try Grape Bread. I had just enough to make the filling and it was similar to preparing the grapes for the pie. Bonus! It makes two loaves!

Just look at this gorgeous purple dough!


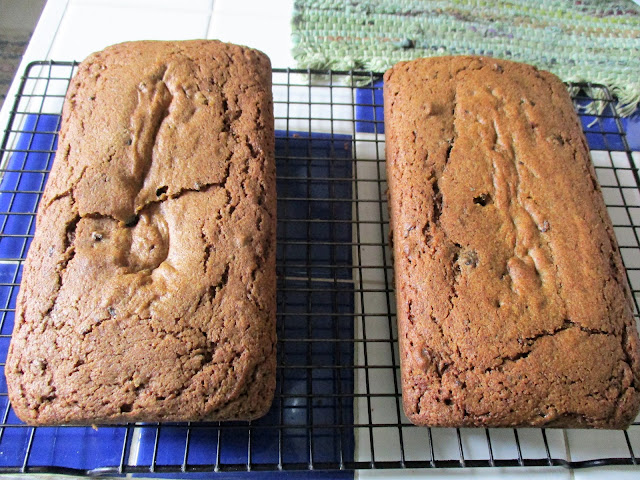
 Not as pretty when they are baked....


But oh so delicious!!


Here is the recipe I used. I got it online from the Farmer's Almanac Staff.

Concord Grape Bread

1 cup Concord grapes
2 1/3 cups sugar
1 tablespoon cornstarch
1/2 teaspoon lemon juice
3 eggs
1 cup vegetable oil
2 teaspoons vanilla extract
3 cups flour
1 teaspoon baking soda
1/2 teaspoon baking powder
1 teaspoon cinnamon
1 teaspoon salt

Remove grapes from stems and wash. Slip skins from grapes and set aside. Bring pulp to a boil. Reduce heat and simmer for 5 minutes. 

Press through sieve to remove seeds. Add skins to pulp and place in blender for a few seconds.

Bring grapes to a boil and simmer 20 minutes.

Mix together 1/3 cup sugar and cornstarch until well blended. Add this mixture and the lemon juice to the grape pulp and bring to a boil again. Cook for 5 minutes until thick. Allow to cool.

Add eggs, oil, 2 cups sugar, and vanilla. 

Sift together the dry ingredients and add them to the grape mixture. Stir until moistened. 

Pour into two greased and floured 9 x 5 bread pans. 

Bake at 350 for one hour (mine was done in about 56 minutes).

Enjoy!!

AnnMarie xoxo

I am linking up with these blog parties this week:

Tuesday, October 16, 2018

Cheddar Apple Bread


There are those foods every Fall, usually comfort foods, that conjure up memories of years past and have become staples in my kitchen.

This Cheddar Apple Bread is one of them.


I don't know where I got this recipe, some 30 years ago, and that is how long I have been making it. Can you tell?


I searched my own blog to see if I had ever posted the recipe, but I had not.

You are in for a treat today.


Cheddar Apple Bread

2 1/2 cups flour
3/4 cup sugar
2 tsp. baking powder
1/2 tsp. salt
1/2 tsp. cinnamon
2 eggs, beaten
3/4 cup milk
1/3 cup margarine/butter, melted
2 cups (8 oz.) sharp shredded cheddar cheese
1 1/2 cups chopped, peeled apples
3/4 cup chopped walnuts

Combine dry ingredients. Add combined eggs, milk and margarine to dry; mix well. Stir in remaining ingredients. Spoon into well greased and floured loaf pan.

Bake at 350, 65-70 minutes or until tester comes out clean (my oven only takes 60 minutes). Let stand 5 minutes. One loaf.

*********

I made the recipe twice, in two separate bowls, to get 2 loaves. I do not know how it would do if I just doubled everything in one bowl.

It is a very dense bread, each loaf weighing almost 2 1/2 pounds. It goes great with Butternut Squash soup, Meatloaf, Chili, Stew.....

Enjoy! Happy Fall!

AnnMarie xoxo

I am linking up with these blog parties:

Tuesday, October 2, 2018

Bathroom Reveal

So last night I was almost done with my bathroom reveal post with all the before and after pictures in place. I hit enter, obviously in the wrong place, and the whole thing deleted, never to be found again!

Yup, I was a little upset. I had written most of it a month ago, and since my memory doesn't go back that far, I could not recall most of it.

This is a before picture of my bathroom at Christmas time
It was just some commentary on the pain and suffering and woes of going through a renovation....ya know, like having to use the toilet that sits in the middle of the basement and showering in the tiny claw foot tub upstairs while all my toiletries are downstairs.


You almost didn't believe me, did you?

Not to mention the daily mess and miscommunication with the contractors. One major setback was to do with thinking we only wanted the floor IN the bathroom changed and not the adjacent hallway.

What? Gorgeous new tile floor next to 1960's gray linoleum?

Nope.

Delay.

I knew my colors would be black and white with Aqua accents. I also wanted a black feature wall and a chandelier hung right in the middle where the fan was. I think they thought I was a little cuckoo.

Do they NOT ever watch HGTV?

Obviously not.

So I am saving you from all the details of the renovation process and let's get on with the before and after pictures.

You're welcome.

The angles may be a little wonky because there is no where to stand to get a good picture. It is small!

BEFORE


AFTER


BEFORE


BEFORE


BEFORE

 AFTER


And just some random pictures.....


I bought three different shower curtains, 2 different light fixtures and three shower liners before we got it right! There is a bit of a learning curve on which liner works on a walk in shower stall as opposed to a tub so as not to soak the whole bathroom after a shower!

I decided to keep the black shower curtain for Fall and Winter and the Aqua one for Spring and Summer.


What's next you ask?? I have to strip the wallpaper in the linen closet/hallway area. I will leave the trim white and re-wallpaper it in this.....


It is a Vintage Damask black and white linen look wallpaper.

I am so excited that I have a toilet that flushes every time, a shower that does not rock while in it, and a floor that doesn't take me back to the 60's, in a bad way! Actually the floor I chose takes me back to my Grandmother's bathroom in the 60's, in a good way.

I am not promising that after this bathroom area is all done that I won't have other places to update in this 1870's Victorian house of mine.

Does it ever end??

Of course I know the answer to that....I live in an old house!

AnnMarie xoxo


I am sharing with these blog parties:

Wonderful Wednesday
Share Your Style
Share Your Cup
Best of the Weekend
Dishing It & Digging It