Showing posts with label lace. Show all posts

Wednesday, April 1, 2015

Pretty Hangers - a DIY

One of my favorite blogs, My Salvaged Treasures, hosted by Betsy, had the cutest DIY that I knew I could actually do! She called them Dressed Up Hangers.

She is using the hangers to display vintage photos...great idea!
I have been collecting the vintage pant and skirt clamp hangers to sell in my Etsy shop and they are quite popular. One customer told me she wanted them to display vintage clothing in her shop. They are great to display cross stitch, doilies, artwork and as you can see, photos.

I have promoted them this way in my listings but never thought to decorate the hanger itself until I saw Betsy's post!

I rummaged through my bags of vintage lace and doilies, my huge stash of vintage buttons and anything else I could find on the top of my craft room desk.

This is my version on her great idea....


The first one I made I used burlap with a little fringe and a burlap flower I had already made.


I simply cut the burlap to fit and glued it in across the front of the hanger with the best glue I'll ever use (no smell!)....
You can find it at Walmart!


The fringe on the next hanger is leftover from last year's project and with a few vintage mother of pearl buttons, it is simple with a little flair.

 
This floral lace is so pretty and shows just enough of the hanger through it to make it a pretty background. The button is a heavy gold cast vintage button.
 
 
I recently took the lace valance down from my bathroom window and it fell apart in my hands! It made me feel a little better about cutting it up for this next hanger. I wrapped the pretty cotton lace a little over the edges of  the hanger. The pretty floral embellishment is actually a brooch from Avon.
 
 
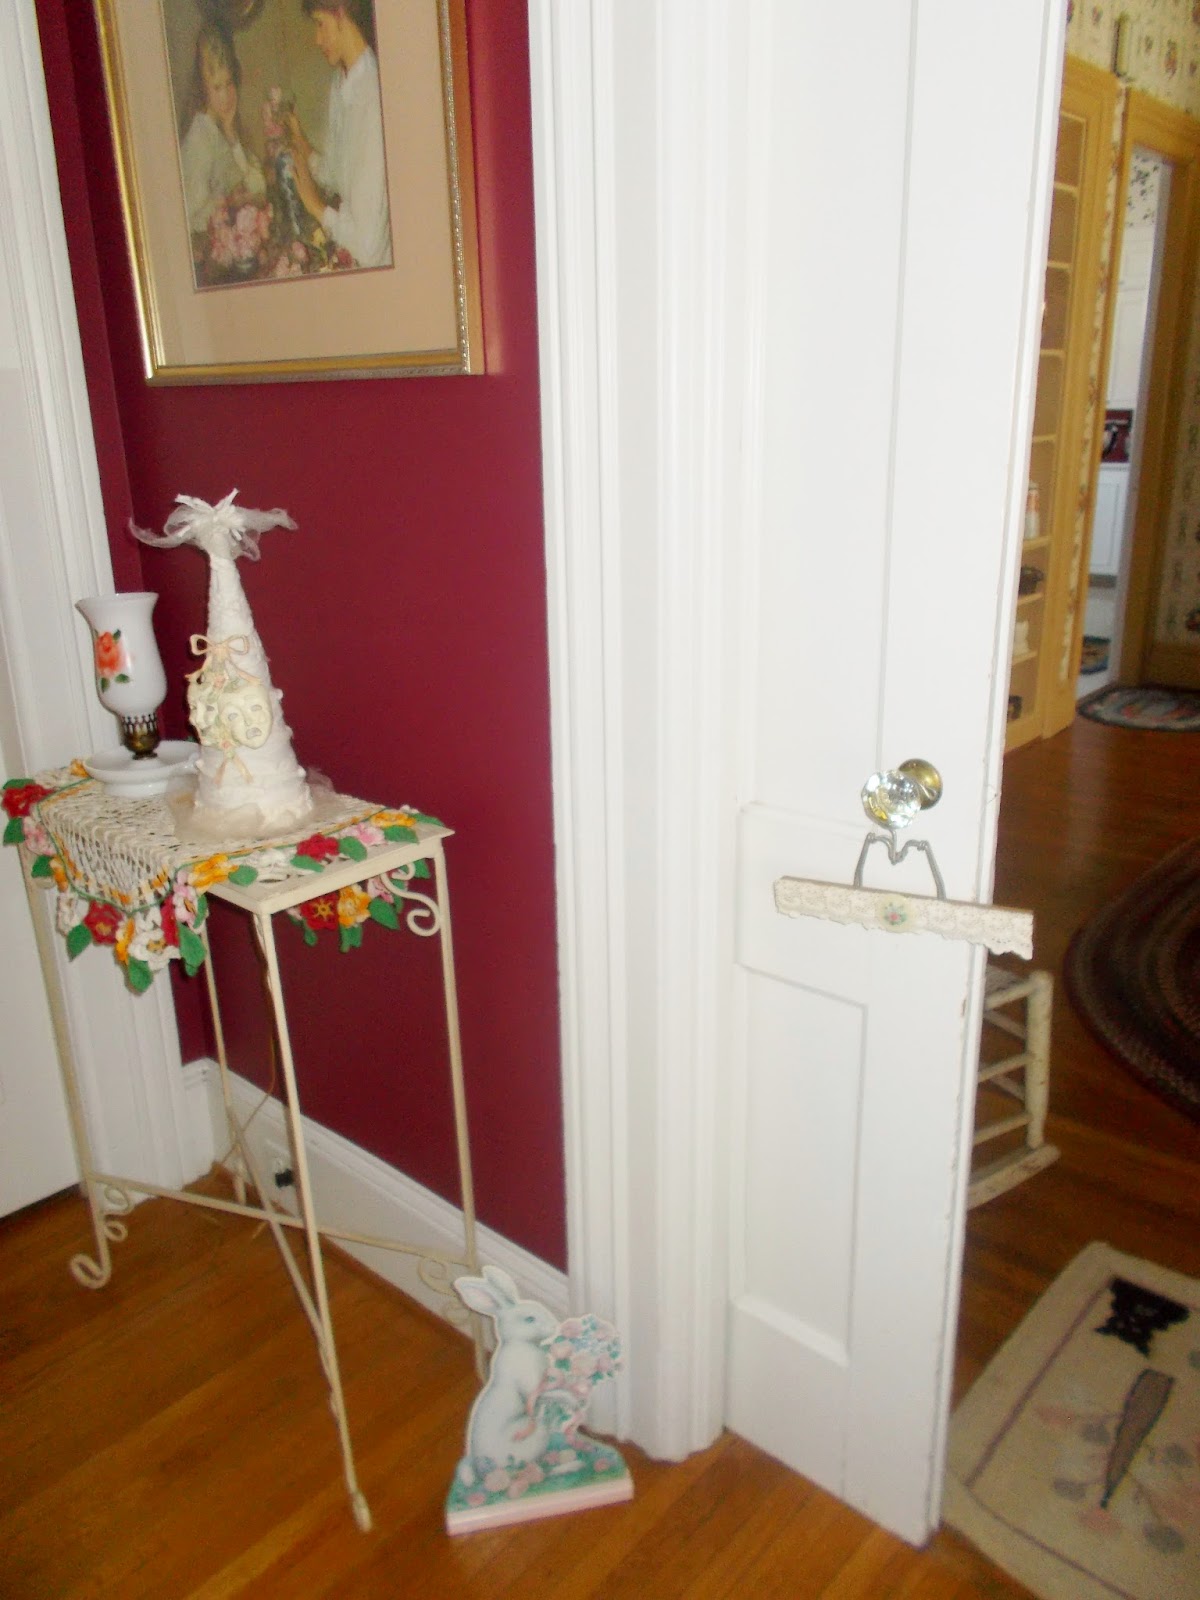
I played around a little bit with ways to use the hangers around my house. I love this one on the door in my kitchen. It can be changed out with the seasons.
 
 
The rustic burlap blends so nicely with the chippy chair that I thought it looked cute just hanging there.
 
 
I love hanging things on the glass doorknobs of the many pocket doors in my house. This one blends in with the room and would look cute with the right doily or vintage photo on it.


From this....
 
 
To this....
 
 
....in very little time, some scrap pieces and a little glue....who knew?
 
Betsy did and I am so glad she shared her pretty hangers with us! Here is another look at her dressed up hangers with doilies....
 
 
Visit her blog My Salvaged Treasures for other pretty projects and treasures that she posts about regularly.
 
All of my newly decorated hangers are available in my shop on the sidebar.
 
AnnMarie xoxo
 
I am linking up with these great blog parties:


Thursday, October 31, 2013

Spray Painting on Furniture - A Guest Post with Eva

Today I have a special guest host with a very pretty DIY project....
Please meet Eva...


Hi everyone! My name is Eva , and I am visiting over from Home Decor by Eva. AnnMarie was kind enough to let me be her guest and share my ideas with you guys (hope you enjoy them!) I started blogging earlier this year to vent out my love for home decor, DIY and crafty projects. I have a long way to go but it is a great help having so many pro's around me to learn from. I hope to polish and grow my blog and enrich it for my readers for a place where they can wander for inspiration and creativity. Happy Reading! xoxo Eva


Spray Painting on Furniture with Lace, Leaves and Different Stencils

Image Source

The Internet never fails to impress with the constant surge of new home decoration ideas. Just when you think you’ve seen all DIY projects that you can possibly try out in your home, there appears another one that sounds more interested than everything you’ve done.

So, after reupholstering your sofas, distressing coffee tables to give them that stylish, antique look and decorating your mirrors with beach shells and jewelry, it’s time to try something new: spray painting on furniture with different stencils.

 
Luckily, this method of freshening up and beautifying your home is currently very popular online, so you’ll find many tutorials on how to decorate your chairs, tables, cabinets, chests, drawers, etc.


How does spray painting with stencils work?


It is very easy to do. All you need is some quality spray paint, something that will leave interesting marks on your furniture and some peace at home to work. Oh, yes, you’ll also need a piece of furniture to work on.
I suggest that you first practice on something that you won’t necessarily place in your home. Find an old wooden chair or table that you can easily part with and try your spray painting skills on that. I experimented with a dresser, a thrift store find which would not look beautiful despite all my efforts! I even purchased a table runner from
Yorkshire Linen, in a poor attempt to make it look pretty. But Alas! Have a look for yourself;
 

 Even when you perfect your skill, you should still do this DIY project on furniture bought at yard sales or furniture that you’ve been meaning to renovate anyway. I painted mine white before starting so it would stand out.

What can I use as stencils?

Many people find lace very inspirational. You’ll find lots of beautiful examples of wooden tables, dressers and chairs spray painted using lace to cover the flat surfaces. Other good things to use are leaves, flowers, or even paper cut out into shapes that you like (stars, butterflies, etc.). This is a totally cost-free and easy way to decorate.


A step-by-step guide to spray painting with lace

After trying out a few tutorials, I modified them a little and found the easiest and most successful way to create a beautifully patterned table:
                                                                                   
1. Find a very cheap or free wooden table- Check (or you may work with something at home too!)


2. Choose a nice lace table cloth to work with, there is a wide variety to choose from.

3. Buy a quality spray paint any color you like. I had heard good reviews about Plasti-Koti.


4. Use the lace to cover the whole surface you’d like decorated and tape it around the edges so it won’t move. Use masking tape for this purpose.

 
5. Stand at an arm’s length away from the table and start spray painting over the lace-covered surface. Don’t stop until you’ve nicely painted the whole surface.

6. Let the paint dry for about an hour or as long as needed. 

7. After the paint is completely dry, remove the lace and reveal the nicely patterned table. I had to mix two shades to get this blue shade.


And here is the after picture, I am so happy with how it turned out! Looks great, doesn’t it?


A more complicated approach

If this tutorial sounds too easy, there are more challenging ways to do this. For example, if you want to spray paint a cabinet, dresser or drawers, you’d need to remove all knobs and handles first before spray painting, so you’d get a flat surface.

You also need to sand off any old paint, and then apply one coat of new paint. After it’s dry, you can continue working in the way described above. And don’t forget to put the handles back once you finish.

Wishing you a nice spray painting adventure!


I hope you enjoyed Eva's tutorial and will go visit her on her blog Home Decor by Eva to see what other pretty ideas she has.

AnnMarie :)


Monday, April 22, 2013

A Mother's Day For My Daughters....

When your daughters are all grown up and are mothers themselves, it is hard to claim one of the biggest holidays of the year just for yourself.

How do you make it special for each of you?

By spending some time together that day. And maybe making them a special gift.

This year I saw something that I really wanted for myself but then got the idea to make one for each of my daughters, Candice and Jena.

They are both mothers with one daughter each. And they are good mothers. And I get to be NaNa to my precious granddaughters Cassidy and Chloe....


So I decided instead of making myself one of these, I would make one for each of them.

 
I apologize that this is not a tutorial per se, because I didn't think of that till they were almost done (I will try and explain what I did to give you an idea of how to make one). And while I was handsewing them, I was thinking about what on earth I was going to blog about today and AHA! That was MY aha moment!
 
I got the idea from Judy Clark's Etsy shop 20 North Ora, which is the address of her childhood home. She says that is where her Mom taught her to do all kinds of needlework. Her shop is full of lovely sewn items. She calls them Beautiful Memories pillows. The front is a pocket to hold keepsakes and pictures of your children. Judy says " I just started making the pillows because I had so many vintage photos that I wanted to do something with and made the first one for my Mother. I collect vintage lace and linens and wanted to do something creative with them so they could be out instead of in a box".

A great idea for Spring and Summer brides.......Judy has made as many as 200 of them for a wedding reception. The bride put a wedding portrait and thank you note in each pocket and put them on the seats at the reception.

She has also made them using pieces from old wedding dresses.

I started mine by cutting 8 1/2 x 11 pieces out of the quilted mattress pad that both girls used in their crib as babies. Yeah, I keep things....for this reason. It is a bit of nostalgia that is now put to great use!

I found two different doilies from my stash of vintage doilies and started playing with the layout on each one. I made sure to pin and sew the embellishments on before sewing the edges together to form the pillow, which makes it alot easier!

 
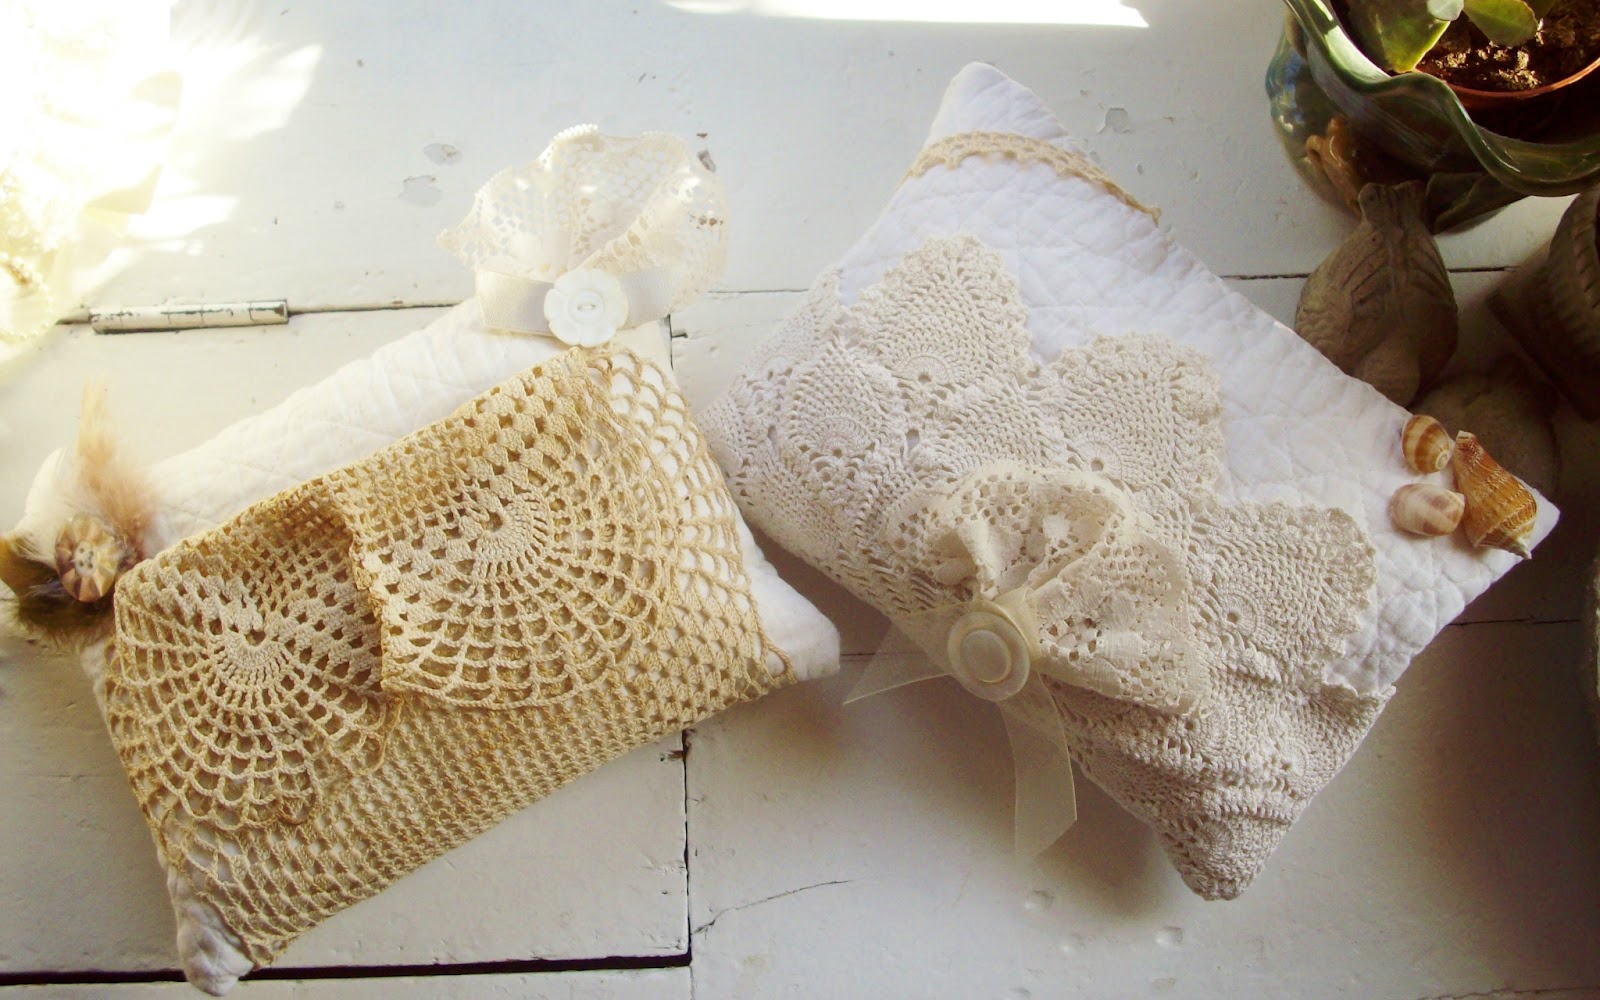
The first one I made was with a doily that is stained all over and looks really old and shabby chic. When I pinned it on and folded over the top for the pocket....oh, my goodness....it looked like an owl. My older daughter Candice just happens to be really into owls right now. I sewed a few stitches down the middle to create a beak and the doily did the rest! I handsewed the doily onto the top piece of the pillow all around the edges. I took a scrap of wide lace, tucked it together, added some trim and a vintage button and put it on the right corner. On the left corner the feathers are glued on and the vintage mother of pearl button is sewn in place. Kinda makes the owl look like he has ears but really the corner embellishments add decoration for when the keepsakes are in the pocket.

The doily is wrapped around the underside and stitched in place.


Add your treasured keepsakes to the pocket and you have a Memories Pillow. I used a picture of my Son and things he drew for this picture.
 
 
For the second pillow I used an oblong doily that has a dark stain in the middle. It was perfect for the shape of the pillow. It is handsewn onto the pillow fabric along the sides and bottom. The back of this pillow is plain.
 
I had to be creative to try and cover that stain. I took a scrap of wide lace, fanned it out and sewed it onto the doily being careful not to catch the pillow fabric since it has to be an open pocket. I added a piece of sheer ribbon and a vintage button to cover up my stitches and the stain is gone! A thin piece of vintage lace trim placed diagonal on one corner and seashells glued on the other finishes this pillow. Both pillows are stuffed with fiberfill and the top is handsewn with a blindstitch. All the materials I used for both pillows are scraps and things I had around the house.


Placed with other pillows on your window seat, a chair, or a shelf, these pillows are decorative as well as useful to hold your most precious memories.


How do you celebrate Mother's Day?
 
AnnMarie : )


Sharing this post on this wonderful blog party and others on my sidebar.....

Nifty Thrift Tuesday