Thursday, November 14, 2013

I've Caught the Knitting Bug


I learned to knit when I was about 12 years old. Haven't since and now I am, well, 50 something. I do remember some of the basics though.

I have my heart set on making a throw for my bed like the picture above. My dream may never be realized as the yarn for this costs $198 a skein!


When my dear friend Bonnie started a prayer shawl ministry I wanted to participate to take up knitting again and learn to make that throw. Bonnie is an accomplished knitter and has the patience to teach others also. I was about to learn a few things from her, and not just about knitting.

Her love of knitting together with her desire to serve the Lord led her to want to start the ministry. As we all can be when stepping out into a new venture, she was hesitant to take that first step. A powerful visual message at our church about breaking down barriers and fears prompted her to step out. Once she did the doors starting opening.


There is a cute café in Williamson, New York called the Firewall Coffee Hall. It is a community sponsored not for profit coffee house. It used to be the headquarters for the Williamson Fire Department and in keeping with that, the inside and outside is decorated with a firemen theme.


Anita volunteers at the coffee house and once Bonnie told her about her ministry, she was happy to open the doors to the ladies.

Anita with her granddaughter Grace who has just learned to crochet.
Every other Saturday morning a group of knitting ladies meet there to knit and chat and drink coffee. They have named themselves The Knit Wits.

The cafe serves Finger Lakes Coffee Roasters coffee, which is locally made and a treat in itself.

 Marcia volunteers serving coffee and goodies and also knits with the ladies.
As I questioned Bonnie about how it all worked, I quickly realized that this was not the place to go and knit what I wanted, but to knit as a ministry for others.

A prayer shawl is a knitted wrap for around your shoulders or legs, a handmade gift covered in prayer. Those that knit pray over the stitches, that they give comfort, peace and warmth to someone who is sick, recovering or downtrodden. They are also nice to give to mothers of newborns, and men who are ill appreciate them also. Bonnie hears wonderful stories about how they are used. One woman takes hers to chemotherapy to keep warm during her treatments. Others have been passed on to the family members as a remembrance of someone who had been in hospice.


A nice discount on yarn at a local craft supply store helped Bonnie supply the yarn at the beginning. Another open door. The knitter supplies the needles. For a beginner, like me, Bonnie casts the stitches on and then you knit. Or, like for me, she had to rip it out twice and cast new stitches on before getting it going because I kept messing it up!

I was so excited to get a couple rows done that I had to take a picture!
After a shaky start I started making headway and my shawl started to show some inches! Obviously I have a long way to go! And that is the part of the draw to join in with these ladies. You don't have to have any experience with knitting, just a desire to serve in this ministry. There is no time frame or pressure to get a shawl done. You just have to reserve every other Saturday for the Firewall Coffee Cafe to sit and knit and chat and drink coffee with other sweet ladies for a couple hours!

Bonnie (right) is helping Carrie (left) get started as Arlene rolls her yarn into a ball.
My daughter Jena joined me the first time I was able to go. She is a knitter herself, since about 12 years old, having learned from her grandmother. She fit right in. I was busy taking notes for my post and knitting in between.


I went around the table asking the ladies how they started knitting.....

Marcia learned to knit  at a women's retreat and has been knitting for 8 years. She makes scarves and socks.

Arlene taught herself to knit from an encyclopedia at 8 years old!

Bonnie learned to knit at 5 years old from an Italian lady in her Philadelphia neighborhood. She made blankets for baby dolls.

Anita started knitting at 17 and made sweaters. She learned to crochet for finishing borders and prefers it over knitting. She has taught her eleven year old granddaughter Grace to crochet. Grace wanted to make a prayer shawl for friends and is learning to make prayer squares and phone cases.

Katherine has been knitting for 7 years and crocheting for two. She knitted and knitted and gave everything as gifts. I have received a knitted poncho, a prayer shawl and a blanket from her. She also has donated baby items to a local co-op shop.

And me, I have been knitting for almost two weeks now and I think I am close to being done with my first prayer shawl! I've got the knitting bug! I've already bought the yarn to start my next one!


 This is a permanent fixture at my couch every night....

The yarn actually matches my bag, a gift from Bonnie!
So pretty, isn't it?

Soon after my time with the Knit Wits I had the opportunity to visit the knitting ladies at a local independent senior living community. Bonnie visits each week to knit and chat and help ladies with their knitting. I was warmly welcomed and asked to come back soon. These two ladies, Carolyn and Peggy were a delight to chat with.


Bonnie is my sister in Christ and like a real sister to me. I truly believe the Lord closed the door on a ministry I was a part of for over 8 years and just couldn't physically do anymore, and opened the door to this prayer shawl ministry. I have already been blessed by my first time with the Knit Wits and my visit to the independent living community. I am looking forward to continuing to make prayer shawls to bless others. I get to share this with Bonnie, my daughter and the other ladies.  I can sit and knit and chat, all things that are not too physically hard to do.

Bonnie and Me.....she is beautiful inside and out


It took me a few months to finally go to the Saturday morning knitting in Williamson....things just kept coming up to keep me from being able to go. I had been struggling with what to do with the ministry I was in and then, in one morning, the doors opened wide to a new ministry while they closed shut on the past one. It's all God's timing and I am happy to step out and obey.

Have you caught the knitting bug yet?

AnnMarie :)

I am linking up to these great blog parties!

Tuesday Trivia
Open House Blog Party
Wednesday's Adorned From Above Blog Hop
What's It Wednesday
Treasure Hunt Thursday
Thursday Social Media Roundup Blog Hop
Freedom Fridays with All My Bloggy Friends
Be Inspired
A Bouquet of Talent Linky Party
Raising Imperfection Link Party
 Sweet & Savoury Sundays
Amaze Me Monday
Marvelous Mondays
Make It Pretty Monday
Nifty Thrifty Tuesday

Monday, November 11, 2013

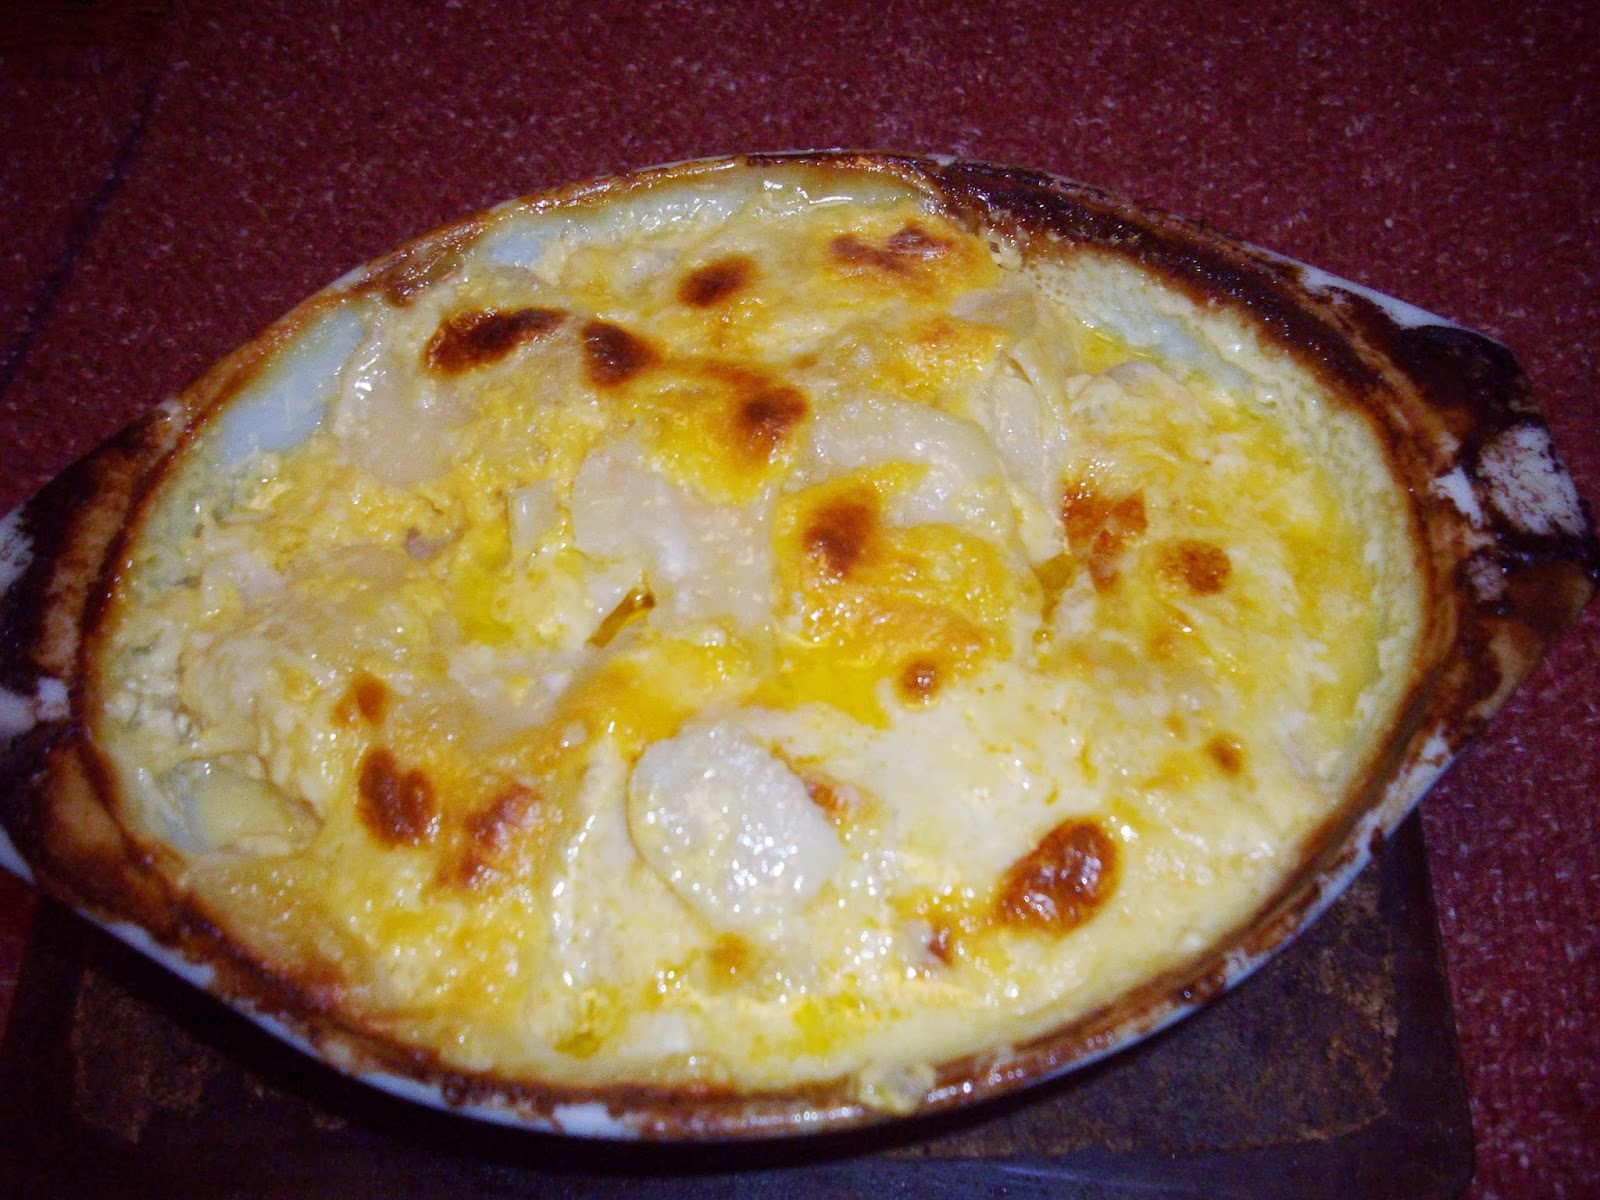
Vintage Scalloped Potatoes


I had to come up with a unique name for my scalloped potatoes to get your attention! And the recipe I am about to share with you is truly vintage!

There are so many recipes out there for these potatoes and they usually involve making a white cheese sauce. Not mine!

This recipe is my own concoction that I made constantly as a single parent when my girls were little. It was during the time when Velveeta was King....in the 1980's. I don't remember what a loaf of Velveeta went for back then but it wasn't the $5.88 I paid recently at Walmart!

 
I had the whole package too....the Tupperware container you could store it in and the cheese slicer that was designed to cut the perfect slice. The slicer has long been lost....or maybe broken from too much use!


For this recipe you will need potatoes, flour, butter or margarine, Velveeta and milk.


The Best The Only Easy Scalloped Potatoes
Time to bake: 1 hour     400 degrees

This is a no measuring, no specific amounts kind of recipe. Depending on the size of your casserole dish and how many you want to serve you will need:

Enough potatoes to fill the dish, peeled and sliced thin (for a 2 qt. casserole I used 4)
Butter or margarine
Flour
Velveeta
Milk
Salt and pepper to taste

Place a layer of sliced potatoes on the bottom of a buttered casserole dish. Top with dots of butter, pieces of Velveeta and sprinkles of flour. Salt and pepper to taste. Keep layering until you fill the dish. Pour milk to about half way up the casserole.
Bake in a 400 degree oven for 45 minutes with a cover on. Take cover off the last 15 minutes.


Let it cool before eating, if at all possible! It is not!


What are you cooking for dinner tonight?

AnnMarie :)

I am linking up with these great blog parties....

DIY Sunday Showcase
A Bouquet of Talent Linky Party
Sweet & Savoury Sundays
Let's Get Social Sunday
Make It Pretty Monday
Amaze Me Monday
Marvelous Mondays
Inspiration Monday
Nifty Thrifty Tuesday
Tasty Tuesday
I Love My Post

Sunday, November 3, 2013

Tips on Starting Your Christmas Cookies Now!


The first week of November is when I start baking my Christmas cookies. Yup, you read that right!

With the right preparation you can bake all your Christmas cookies in November, tuck them away in the freezer and have the whole month of December to enjoy the season.

I have been doing it for 30+ years and I make 10-12 kinds of cookies every year!


There is some prep work and leg work to do ahead of time to make sure all goes smoothly when that first week rolls around just after Halloween.

The idea is to plan, buy, bake, freeze, relax!

I realize that the time to do a few of these first tips has come and gone but you can still catch up and get on schedule. There's still plenty of time! Next year you can get this list out on October 1st and get your head start!


Here is a list of my tips:

1. In late September, early October, make a list of all the ingredients you will need for all the cookies you want to bake. Buy a few of your ingredients every week in October with your regular groceries. Your budget won't feel it as much when done a little at a time. It is also a good time to start saving the nicer plastic containers that store bought foods come in for giving cookies away in....more on that later. Dig out your Christmas cookie tins too! I will have a tip on how to get those returned back to you.
  
2. Choose a few kinds of cookies to bake each week. I do 2-3 kinds a week because I make so many. Bake in the morning if possible which gives a great sense of accomplishment for the rest of the day! Cool the cookies and DO NOT frost them.


3. Make sure to have plenty of wax paper, foil, and foil pans to freeze in. Put the cookies in layers with wax paper in between in the foil pans, cover with foil and write the name on the outside with marker. FREEZE! This step avoids disappearing cookies at the hands of husbands, little ones or teenage appetites before it's time to really indulge!


4. In mid-December on up to Christmas Day I defrost a variety of cookies as I need them to give away. I frost and decorate the cookies the day I will be delivering them. I always get comments on how fresh they are!

I defrost and decorate cookies for the Post Office clerks, my allergy shot office, the Town Clerk's office, and those that I mail out of town first and package them in a plastic container with wax paper and a bow. All those people are in my life all year and I like to give them a treat. I use the plastic containers for them so that I don't have to worry about getting them back.

Closer to Christmas I defrost, frost and decorate the cookies I will give to my Pastor's and their families, for holiday gatherings, special friends and my family. I layer, with wax paper in between, a variety of cookies and present them in one of my large collection of Christmas tins. I get those tins returned to me every year so that I don't have to keep buying them. They are getting pricey!

Wanna know how I do it?


I hand write this little note on sticky paper and put it on the inside of the cover. I have never NOT gotten a tin back. Maybe because I DO fill them again the next year for those nice people! I have had people panic when they have forgotten to get the tin back to me by January, so worried that I wouldn't give them cookies again. Somehow that makes me feel good!


Most of my recipes are either my grandmother's or the ones I have been making since the 80's. They are mostly Italian Christmas cookies. I add one or two new ones a year along with a different kind of chocolate bark or Christmas candies.

I make the traditional cut outs, gingerbread men and coconut macaroons. The other cookies I make have names like Cuccidari (Italian fig cookies), Chocolate Meatballs and Biscot.

Starting with the first picture at the top of this post and the others of the stages of baking are pictures of the Cuccidari's. Click on the name to get the recipe and tutorial I did a few years ago. In my house  it is NOT Christmas without the Cuccidari's. Of course they have the most ingredients, the most pricey ingredients and are the most labor intensive!

It has been a labor of love for me for 30 years.

I took the Christmas cookie baking over from my mother who took it over from her mother. Still waiting for one of my daughters to take over although I am not sure I am ready it give it up...shhhh!

In December I like to finish shopping, put last minute touches on decorating, go to holiday craft shows and spend time with my girlfriends.

I can do all that and more because my cookies are done!

What kinds of cookies do you bake each year? Are you a last minute baker trying to get them all done the week before Christmas? How many varieties do you make? Do you give them away?

I would love to hear about your Christmas baking adventures!


AnnMarie :)


I am linking up with these great blog parties!


Thursday, October 31, 2013

Spray Painting on Furniture - A Guest Post with Eva

Today I have a special guest host with a very pretty DIY project....
Please meet Eva...


Hi everyone! My name is Eva , and I am visiting over from Home Decor by Eva. AnnMarie was kind enough to let me be her guest and share my ideas with you guys (hope you enjoy them!) I started blogging earlier this year to vent out my love for home decor, DIY and crafty projects. I have a long way to go but it is a great help having so many pro's around me to learn from. I hope to polish and grow my blog and enrich it for my readers for a place where they can wander for inspiration and creativity. Happy Reading! xoxo Eva


Spray Painting on Furniture with Lace, Leaves and Different Stencils

Image Source

The Internet never fails to impress with the constant surge of new home decoration ideas. Just when you think you’ve seen all DIY projects that you can possibly try out in your home, there appears another one that sounds more interested than everything you’ve done.

So, after reupholstering your sofas, distressing coffee tables to give them that stylish, antique look and decorating your mirrors with beach shells and jewelry, it’s time to try something new: spray painting on furniture with different stencils.

 
Luckily, this method of freshening up and beautifying your home is currently very popular online, so you’ll find many tutorials on how to decorate your chairs, tables, cabinets, chests, drawers, etc.


How does spray painting with stencils work?


It is very easy to do. All you need is some quality spray paint, something that will leave interesting marks on your furniture and some peace at home to work. Oh, yes, you’ll also need a piece of furniture to work on.
I suggest that you first practice on something that you won’t necessarily place in your home. Find an old wooden chair or table that you can easily part with and try your spray painting skills on that. I experimented with a dresser, a thrift store find which would not look beautiful despite all my efforts! I even purchased a table runner from
Yorkshire Linen, in a poor attempt to make it look pretty. But Alas! Have a look for yourself;
 

 Even when you perfect your skill, you should still do this DIY project on furniture bought at yard sales or furniture that you’ve been meaning to renovate anyway. I painted mine white before starting so it would stand out.

What can I use as stencils?

Many people find lace very inspirational. You’ll find lots of beautiful examples of wooden tables, dressers and chairs spray painted using lace to cover the flat surfaces. Other good things to use are leaves, flowers, or even paper cut out into shapes that you like (stars, butterflies, etc.). This is a totally cost-free and easy way to decorate.


A step-by-step guide to spray painting with lace

After trying out a few tutorials, I modified them a little and found the easiest and most successful way to create a beautifully patterned table:
                                                                                   
1. Find a very cheap or free wooden table- Check (or you may work with something at home too!)


2. Choose a nice lace table cloth to work with, there is a wide variety to choose from.

3. Buy a quality spray paint any color you like. I had heard good reviews about Plasti-Koti.


4. Use the lace to cover the whole surface you’d like decorated and tape it around the edges so it won’t move. Use masking tape for this purpose.

 
5. Stand at an arm’s length away from the table and start spray painting over the lace-covered surface. Don’t stop until you’ve nicely painted the whole surface.

6. Let the paint dry for about an hour or as long as needed. 

7. After the paint is completely dry, remove the lace and reveal the nicely patterned table. I had to mix two shades to get this blue shade.


And here is the after picture, I am so happy with how it turned out! Looks great, doesn’t it?


A more complicated approach

If this tutorial sounds too easy, there are more challenging ways to do this. For example, if you want to spray paint a cabinet, dresser or drawers, you’d need to remove all knobs and handles first before spray painting, so you’d get a flat surface.

You also need to sand off any old paint, and then apply one coat of new paint. After it’s dry, you can continue working in the way described above. And don’t forget to put the handles back once you finish.

Wishing you a nice spray painting adventure!


I hope you enjoyed Eva's tutorial and will go visit her on her blog Home Decor by Eva to see what other pretty ideas she has.

AnnMarie :)


Tuesday, October 29, 2013

Halcyon Days Autumnal Haze

October
O hushed October morning mild,
Thy leaves have ripened to the fall;
Tomorrow’s wind, if it be wild,
Should waste them all.
The crows above the forest call;
Tomorrow they may form and go.


O hushed October morning mild,
Begin the hours of this day slow.
Make the day seem to us less brief.
Hearts not averse to being beguiled,
Beguile us in the way you know.
Release one leaf at break of day;
At noon release another leaf;
One from our trees, one far away.
Retard the sun with gentle mist;
Enchant the land with amethyst.
Slow, slow!
For the grapes’ sake, if they were all,
Whose leaves already are burnt with frost,
Whose clustered fruit must else be lost—
For the grapes’ sake along the wall.
    In this poem Robert Frost asks Fall to slow down, to drop only one leaf at a time from a tree near and a tree far away.
    Although it feels like Fall is ending with bare trees and graying skies, the Autumn Equinox actually does not end until December 20th.
    So enjoy the rest of the halcyon days and the autumnal haze....
AnnMarie :)

I am linking up with these great blog parties:

Make It Pretty Monday
Tuesday Trivia
The Scoop
You're Gonna Love It
Nifty Thrifty Tuesday


Wednesday, October 23, 2013

The Fruits of My Adventure and A Grape Pie Recipe


I am still relishing in my weekend in Naples and as I promised, the recipe for the grape pie is in this post. There are some random tidbits from my trip that have created memories for me that I wanted to share with you first. If you just can't wait and just want the pie recipe already....scroll to the bottom!


This is the vineyard next door to the Guest House we stayed in, right on Main Street, Naples. I walked up to it to see if there were still grapes on the vines and the strong, pungent smell of concord grapes told me YES even before I reached them!


The proprietors of the Guest House are a sweet couple with a unique sense of style inside and out. In their backyard I found this fabulous, old, chippy boat all moored up as if it were at the lake.


Inside, the décor was so pretty with lots of warm browns, reds, oranges and golds for color, perfect for this time of year.

 
I happened to notice the doorknob on the bedroom door. Very unique!


Joseph's Wayside Market is a wonderful open air farm market with a huge variety of things. I hadn't gotten my gourds or Indian corn yet for the season so I picked them up there along with a Mexican Hat Squash. I don't know if you are supposed to eat it or not.....I just thought it would go perfect on the centerpiece for my dining room table I was already putting together in my head with all the things I was buying. It is that big orange striped thing in the middle that looks like, well, a Mexican hat!


I had seen a blog post on using an old piece of wood or a plank as a centerpiece and then just adding whatever decorative items to enhance your theme. I found an old plank of knotty pine in the garage and that became the base for my centerpiece. I added a vintage crocheted runner for contrast.


I picked up a bunch of Bittersweet at the grape stand for $4 (which is really cheap!) and added my vintage quail planter and some waxed leaves. I love how it all turned out.

 
On our way out of town heading toward home, we found a quaint farm stand surrounded by vineyards with lots of grapes for sale.
 
 
I learned from these sisters that the only color grape to make a pie with is the dark purple, or concord grape. The others are for eating and boy, are they delicious!


Oops, I forgot to take a picture of the whole pie before I just had to try a sliver of it. It was worth the not so perfect picture!
 

The recipe I used comes from Applehood and Motherpie, a favorite of mine and a cookbook I have mentioned and posted numerous recipes from. Actually I used three different recipes for this pie from two different cookbooks. My husband's boss said it was the best grape pie he ever tasted so I guess that's okay to do!

Some how-to pictures to follow.

Finger Lakes Grape Pie
 

For the Crust:
I use this crust for most pies because it is so easy and so good. It is also from Applehood and Motherpie.
 
2/3 cup shortening                                                    Cream shortening with salt. 
1 teaspoon salt                                                          Add boiling water and mix with a whisk.
1/4 cup boiling water                                               Add flour. Mix.
1 1/2 cups flour                                                        Press crust into 9" pie plate

 
For the Filling:
This filling makes enough for two pies
 
3 cups Concord grapes                                            
1 cup sugar
3 tablespoons flour
1 tablespoon lemon juice
1 tablespoon butter, melted

Wash, drain and stem grapes. Remove and reserve skins. Simmer pulp for 5 minutes.
While hot, press pulp through sieve to remove seeds, or use a pestle and strainer.
Combine strained pulp with skins.
Combine sugar and flour and add to grapes. Blend in lemon juice and butter.
Pour into crust. Cover with topping.
 
For the Streusel topping:
I like a streusel top better but you can use your own recipe for two pie crusts for top and bottom.
This recipe is from Thru the Grapevine, another Fingers Lakes region cookbook.
 
1/2 cup quick cooking oats                                       Mix oats, sugar and flour; cut in butter.
1/2 cup brown sugar                                                  Place on top of pie.
1/4 cup flour
4 tablespoons butter
 
Bake the pie at 425 for 10 minutes and then 350 for 30 minutes, or until the top is nicely browned.

Some how-to pictures.....

 
The easiest way to get the skins off is just to squeeze the grape and they pop right off.
 
 
I used a pestle and a strainer to separate the seeds. Worked great!


The finished pie, all juicy and crunchy and sweet at the same time. This pie did not last long in my house of reformed non-pie eaters! The other one is in the freezer for another time.

 
I hope you will try my recipe if Concord grapes are available in your area.
 
Thanks for walking down memory lane from my weekend getaway with me!
 
AnnMarie :)
 
I am linking up with these great blog parties!