Monday, June 8, 2015

On a DIY Roll!


DIY projects, up-cycling and repurposing are pretty new adventures for me and I have had more fails than successes.

I crafted in the 1980's, which included stenciling, sewing and tole painting and a little of everything else in between. I am not really interested in the sewing or painting or everything else anymore but my love for stenciling has been renewed!

I have my blogging friend Diana, from Adirondack Girl @ Heart to thank for that. She featured some stencils from Decor Art and the great things she made from them on her blog. Click and visit her for all her own great DIY ideas.

I quickly clicked over to the website and ordered three different stencils from the Americana Decor Collection. They are very inexpensive and great quality. There are seven different collections to choose from!

I already had the brushes (from the 80's!) and lots of paint.

I was hooked.

My first project with the stencils was a small wood table my husband got for $5 at a yard sale. He wanted something small that would fit against the wall for materials for our community theatre. I made him agree that it was going to be my first attempt at stenciling again after 30 years. It was ugly and needed a makeover before it went to the theatre!


I was anxious to try out the Distressed Harlequin and Olde World Numbers stencils I had bought.
I painted the whole table with Oatmeal Chalk Paint, distressed it lightly and then stenciled the Distressed Harlequin in Cascade, a pretty aqua color, on the top.


Then, dying to try out the numbers, I stenciled No 201, also in Cascade, on the bottom, which is the address to the theatre. It is a little off center but for my first try I decided to leave it.


I buffed the whole table with MinWax Paste Finishing Wax and it was done!


Here it is at the theatre with materials on it. My husband had both shelves filled but then took most of it off. He said I did too good of a job to cover it all up. Sweet!


I needed a gift for my friend Tree's (nickname for Theresa!) birthday and I hadn't gotten enough of trying out the Harlequin or numbers stencils yet. I asked her what her favorite flower, favorite number and favorite color was. I had an idea.

 
I painted a terra cotta pot in a pale sage green except for the inside. I wasn't worried about the edges either because they would be covered up.


I started stenciling the Distressed Harlequin in a darker shade of sage onto the pot and quickly realized that it was going to be harder than I thought. I was so excited to order stencils that I didn't realize that there is a collection specifically made for pots and rounded things! The one I was using is quite stiff. I made it through though, after a few attempts. Learn a lesson ahead of time from my faux pas!

 
I struggled pretty much the same through adding the No 4 but I got through that too.
 
 
Her answers to my favorites questions? She loves Hydrangeas, dark purple and the number 4, her birth date. I was happy how it all turned out and so was she!


My last DIY is not a stenciling project but rather an idea I got from my friend Susan. She and her husband Ken are quite talented in all areas of home décor and do most of the work themselves. I was shopping with her one day while she was looking for a light for over her new bathtub. Nothing was just right that day. Later I got a text from her with a picture of an old rusty birdhouse she had in her garden, swagged over the tub with a light bulb in it. It looked fabulous! I wanted one too!


Lucky for me I soon found my own vintage, rusty birdhouse. It didn't take long to decide that it would be the side porch hanging light I had always wanted.
 
I filled the bottom with faux ivy vines, got a hanging pendant light from Lowe's, and in about 20 minutes had a great light fixture and I did it myself! It was as simple as fitting the pendant light between the wires on the top of the cage and then hanging the cord on a hook, creating a swag over to the wall and stapling it down.


The birdcage was already painted white, distressed and a little rusty.


It even has the porcelain water cup on the side.


Now that I got that out of my system, back to what I do best! Thrifting and picking and garage saling!
 
I may get brave and try another stencil project. I still have a great Vintage Keys stencil to try out.
 
 
What DIY projects are you good at?
 
 
AnnMarie xoxo
 
 
I am linking up with these fun blog parties this week:
 

Tuesday, June 2, 2015

Thrifty Treasures and a Purple Cow

 
I never saw a Purple Cow,
I never hope to see one;
But I can tell you, anyhow,
I'd rather see than be one.
                                            Gelet Burgess, 1895
 
The purple cow was my final buy at a street long yard sale in a neighboring town. The woman I bought it from said her mother collected them and that there was a poem about purple cow's that she liked. I found it and some history about it and the author on Wikipedia here.
 
It was a gorgeous morning and I was at the first house at the sale when it opened at 9 a.m. I reluctantly had to leave at 2 p.m. If I didn't have to pick up my granddaughter Cassidy at school, I would have stayed longer! I had some shopping time alone before meeting up with my new thrifting buddy Kim.


I zeroed in on the pink 1950's trunk from the other side of the street. The woman selling it said it was her doll trunk when she was a girl. She revealed to me that she is now 66. Needless to say, I had to have it!


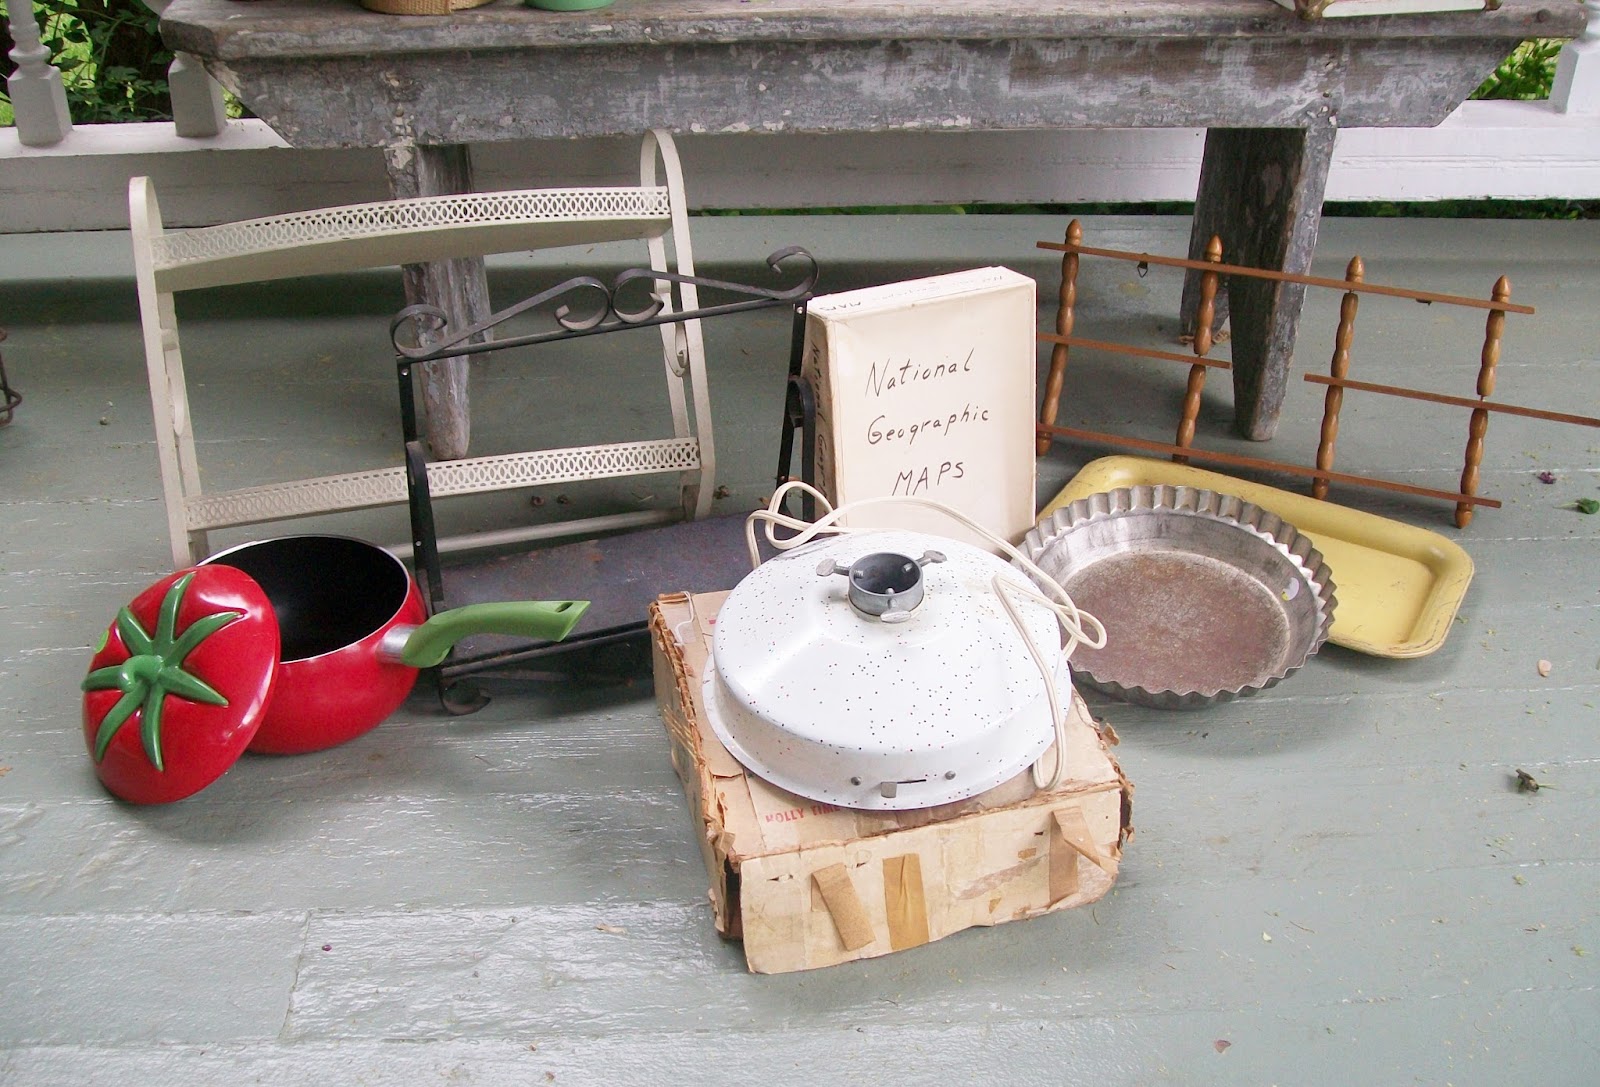
The round fruit basket tops (behind the trunk) have great, wide slats for stenciling, a renewed passion for me. Not sure what I will stencil but I picked up three of them for under $2. The cute sunflower mirror is a cheapy metal piece. I had to have it for my side porch for $1!


Lately I find that I am so drawn to the old clothespins of the 1950's. I picked a huge basketful at the last estate sale I attended. When I saw these two clothespin bags filled, I just wanted them. I don't even have a clothesline! The canvas bag is pretty ripped up and I am going to try and repair it or replace it all together. The old frame on it is great. The blue print bag is in great shape and may be listed in my Etsy shop, including the clothespins!


The two straw purses were a great find. The one on the right is trimmed in British Tan leather, including being lined inside with a pocket, all in the same leather. It has four painted wood ladybug beads on the front. The smaller one has yarn embroidery and raffia flowers. Both are listed in my Etsy shop, here and here.


I am also so drawn to stoneware pitchers lately. The jadeite colored green one had to go home with me to add as an accent in my kitchen. I also found a large roll of burlap ribbon and a vintage glass jar to make a miniature scene in.


The tomato covered pot is not old but is a keeper for  me! I found three shelves....an ivory metal one, a wrought iron one, and a retro wood knick knack shelf....all different and unique. A tin tart pan, an enamelware tray in yellow and a 1950's musical tree stand that rotates. My favorite find of the day and the one I am most excited about was actually spotted by Kim. I probably would have passed it by!


A whole box of National Geographic maps of the world, all in great shape, all dated in the 1960's. I know these are great for crafting. I have seen them used to line vintage trunks.....fabulous! Half price for the whole box of 18 wasn't bad either!


This little pitcher never made the group picture. It was inside the straw handbag for safe keeping. It is adorable and I haven't decided yet to sell it or keep it.

 
Out of all the items I picked that day I am keeping about eight of them, for now. Finding all these great treasures has recharged my desire to decorate my own home.


Sometime after Mr. Burgess wrote his purple cow poem he wrote a follow-up to it....
 
Ah, yes, I wrote the "Purple Cow"—
I'm Sorry, now, I wrote it;
But I can tell you Anyhow
I'll Kill you if you Quote it!
 
 
Oops! I think I'm safe....that was 120 years ago!
 
AnnMarie xoxo
 

Thursday, May 28, 2015

Crazy for Aqua!


I originally thought this post was just going to be about the aqua touches I have been adding to my front porch. I started adding my new favorite color last year with this vintage chair I got at a barn sale for $2 and the reproduction vintage watering can I probably paid too much for! This year I have just gone more crazy for aqua and keep finding new ways to add it in.


And, as I was working around the yard and even when I went for a walk I realized I had even more aqua to show you.

 
Starting on the front porch....
 
 
I saw this idea for a colander planter a while ago and I just happened to have picked up the aqua colander purely for it's color. I found the weighing plate of a vintage kitchen scale at a local vintage/gift shop. I had a hook on the front porch just waiting for something new. I planted Lobelia in it and now I am just waiting for it all to fill in and out.


I found the chair with the rush seat on the side of the road last year and immediately painted it in aqua chalk paint. Picking through my own basement turned up the 80's style birdcage that got a quick spray paint of a lighter aqua.

 
The nest was found in our yard under the pine tree and the paper mache birdie was already in the cage.


Even my little hand painted flower pot has aqua flowers!


I found this great iron wall hanging at a yard sale last year and it just ended up in the basement. Finding it again in all my porch stuff was fun and I knew it too was going to get a coat of light aqua. I only did one coat and kinda liked how the original dark color came through. I left it like that for now and hung it up.


A close up.....does it need another coat?

 
The original brass house numbers are in an odd spot and so darkened that no one can find my house! I got the brilliant idea to paint them aqua! They show now!


Just around the side of the front porch is a small area where iris are planted. I stuck this hand made teacup garden stake in there. The plate and hand painting just happens to be aqua!


Down the side of the house are massive amounts of greenery and varieties of foliage that were here when we bought the house. These cute Forget Me Nots are aqua and I love when they appear every year.


There are some on the other side of the yard too!


Another item picked from my own house is this wire planter. I spray painted it aqua last year when the aqua craze started. The Lobelia is starting to fill in.

 
This chair was lovingly painted aqua last year and then it got quite worn over the summer from all the rain. I took it out this year to repaint it and decided I really liked the bare look with just a hint of color. Those huge impatiens better fill out to 12" wide like the girl at the garden center told me!


I have decided that I love all shades of aqua....pale, like on the birdcage, to the bright, rich aqua like on the colander and all the other shades in between.
 
I recently bought a pair of Skecher's for a diabetes walk I was going on. I chose them for the color of the shoelaces.
 
Aqua!


I would love to add aqua somewhere inside the house, and I have a plan in the works, but that is for a winter project and a future post!

Is there a color you just can't get enough of?

AnnMarie xoxo

I am linking up with these fun blog parties:

 Share Your Style
What's It Wednesday
Chic By You Wednesday Linky Party
Thursday Favorite Things Blog Hop
 Home and GardenThursday
Vintage Inspiration Party
Share Your Cup Thursday
Best of the Weekend
Bouquet of Talent Linky Party
Anything Blue Friday
Something to Talk About Link Party
Make It Pretty Monday

Saturday, May 23, 2015

Strawberry Rhubarb Pie

source
 
It's Rhubarb season in my area and Strawberries will be coming along in June.
 
I made my first Strawberry Rhubarb Pie yesterday and my oh my was it good. The only recipe I ever use is from my Betty Crocker's Cookbook from the 1970's. That cookbook is in rough shape, proving how much I have used it over the past 30+ years and how enduring the recipes are.


The rhubarb was from a local farm and was given to me as a gift. It was huge. It was about 3" wide by 2 feet long....really! Sorry I didn't get a picture of it. I have enough for at least two more pies. It freezes well in a plastic freezer bag.
 
I had to use store-bought strawberries, which aren't as sweet as local, but this recipe has enough sugar in it to make anything sweet!


Strawberry Rhubarb Pie
 
 
Pastry for 9" two crust pie ( I cheat and use Pillsbury's All Ready Pie Crust)
1 1/3 cups sugar
1/3 cup flour
1/2 teaspoon grated orange peel (optional)
2 cups cut up 1/2" pieces of rhubarb
2 cups sliced strawberries
2 tablespoons butter
 
Heat oven to 425 degrees. Prepare pastry in your pie plate.
 Stir together sugar, flour and orange peel.
Turn 1 cup of the rhubarb and one cup of the
strawberries into the pie crust and
sprinkle half the sugar mixture on top.
Repeat with remaining rhubarb, strawberries and sugar mixture.
Dot with butter. Cover with top crust, seal and flute.
 Cut slits into the top. Sprinkle with sugar.
Cover the edge of the pie with foil to prevent excessive browning.
Remove the foil the last 15 minutes of baking.
Bake 40 to 50 minutes. or until crust is brown and juice bubbles out of slits.
 
 
Enjoy this sweet, tart pie either warm or cold with whipped cream. It is quite juicy so I could not get a good piece out of the pie plate for a mouthwatering, enticing picture!
 
 
It's not about the presentation, it's about the taste!
 
AnnMarie xoxo
 
 I am linking up with these great blog parties: